How to Choose White Birch Veneer for Your Project
White Birch Veneer can bring a calm, light finish to furniture, cabinets, and wall panels. But a pale surface alone does not guarantee a good result. Grain pattern, sheet size, thickness, backing, and finish all affect how the veneer looks and performs. A sample may appear creamy under showroom lights, then shift toward yellow beside a sunny window. Check it in the room where it will be installed.
Wood scientist Dr. Eugene Wengert is a recognized authority on wood properties. The following is a practical paraphrase, not a verbatim quotation: “Choose wood for the conditions it must serve, not appearance alone.” That principle matters when comparing White Birch Veneer grades and construction. Ask suppliers about matching, splicing, core materials, and recommended adhesives. For a broad cabinet door, a consistent grain match can make the surface feel intentional. For a small drawer front, natural variation may be less noticeable.
Small details matter. Inspect several sheets, not just one. Note color shifts, mineral streaks, and grain direction. Then test your intended stain or clear coat on an offcut. It may surprise you. Veneer can absorb finishes unevenly, and a sample chip may not represent a full panel. Even careful planning has limits; natural wood varies. This guide will help you compare options, ask sharper questions, and choose veneer suited to your project’s look, budget, and working conditions.
Identify Your Project’s Purpose and Performance Needs
A cabinet door, a wall panel, and a desk surface place different demands on white birch veneer. Define the use before comparing appearance. For furniture that gets daily contact, consider the finish, edge protection, and resistance to scratches. For a decorative wall, color consistency and grain direction may matter more than impact resistance. A useful test: hold a sample beside the room’s actual lighting.
Check how the veneer will be supported. Veneer is a thin surface layer, so the core panel carries the structural load. Ask about the core, veneer thickness, and recommended adhesive or pressing method for your fabrication process. In humid rooms, confirm that the full panel construction suits the expected conditions; a good face veneer alone cannot prevent movement. Small details count.
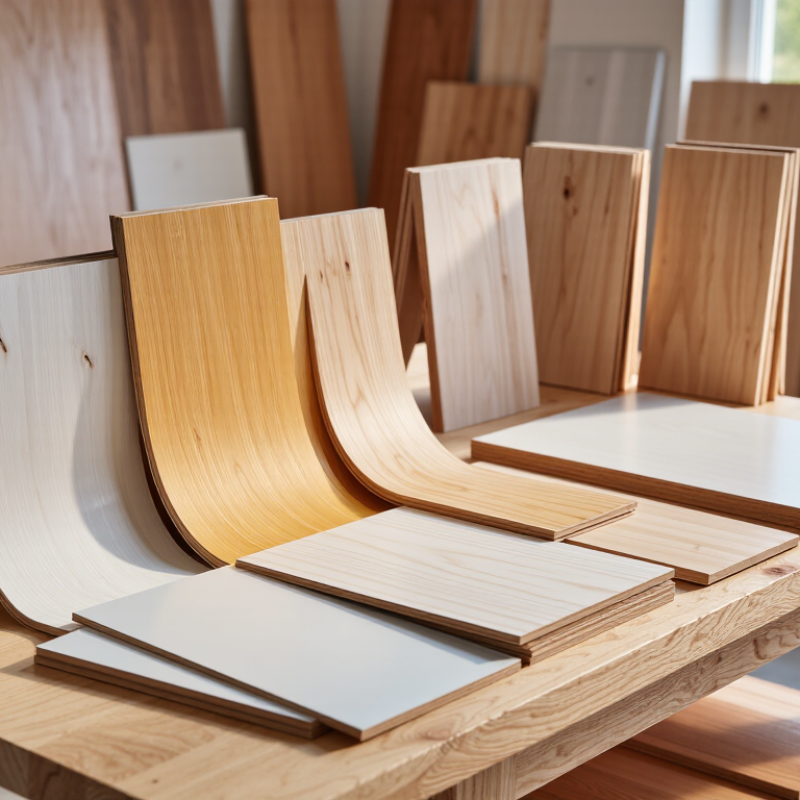
White birch can show pale cream tones, fine grain, and occasional natural variation. If several panels will sit side by side, request samples from the same lot when possible, then view them together. Also test the planned stain or clear finish on an offcut. It may deepen the color more than expected. I would not choose from a photograph alone; screens and room lighting can mislead, and that is an easy mistake to make.
Compare White Birch Veneer Grades and Appearance
White birch veneer grades describe surface appearance, but grade names can differ between suppliers. Ask for the grading standard and inspect the actual sheets before ordering. A higher appearance grade usually has fewer knots, mineral streaks, patches, and color shifts. It suits cabinet doors, panels, and other surfaces that remain visible.
Lower grades may include more natural variation, filled defects, or uneven grain. These features can work well inside cabinets or in a rustic design, where a perfectly uniform face is not needed. Look closely at the veneer under lighting similar to the project space. A pale sheet can appear warmer beside darker flooring. Small detail.
Cut also affects appearance. Rotary-cut veneer often shows broad, repeating grain, while sliced veneer tends to reveal straighter, more familiar board-like patterns. Neither is automatically better; match the look to the panel layout and surrounding wood. Check for consistent thickness, sound backing, and clean edges, too. Grain can shift between sheets, even within one bundle, so lay several faces side by side before committing. I have found that a sample alone can be misleading. A larger viewing area tells more.
Select Veneer Thickness, Cut, and Backing
Start with the thickness your substrate and finishing plan can support. Thin, flexible birch veneer suits gentle curves and stable panels, but offers little sanding allowance. Thicker veneer can tolerate light leveling and minor surface repairs, though it may resist tight bends. Check the stated thickness, not just the product label; sanding and adhesive can change the final fit. That matters.
Cut determines the face pattern. Rotary-cut sheets often show broad, flowing variation, while plain-sliced veneer tends to create cathedral figures and straighter repeats. Quarter-cut birch usually looks more linear. Lay several leaves side by side before choosing, because a small sample can hide shifts in grain and color. The pattern may look calmer under finish.
Backing affects handling. Paper-backed veneer is easier to position and can reduce splitting; fleece-backed options add flexibility for some applications. Unbacked veneer creates a thinner build, but requires careful handling and an even adhesive spread. Match the backing to the panel, curve, and pressing method, then test an offcut with your actual finish. I would not skip that test; birch can appear warmer or more yellow than expected.
Check Moisture, Adhesives, and Installation Requirements
White birch veneer shows pale grain and small color shifts, so inspect several sheets before choosing. Check moisture with a calibrated meter, and compare readings across the stack. One reading is not the whole story. Let panels acclimate in the project space according to the supplier’s guidance, especially when rooms are damp or heated. Record the readings and room conditions; this simple step can help explain later movement.
Tips: Confirm the veneer’s backing and core before selecting an adhesive. Follow the adhesive maker’s instructions for open time, spread rate, and pressing pressure. Test a small offcut first. A glue that works on one panel may behave differently with another backing or finish.
Plan installation around a clean, flat, dry substrate. Remove dust, and check that the surface is even before bonding. Keep veneer edges supported, and avoid trapping air beneath the sheet. For large areas, a roller or press can help create consistent contact, but use the method recommended for the panel. I would still inspect the first installed piece in good light; small bubbles and edge lift are easier to address early. Allow for the project’s expected temperature and humidity changes, rather than assuming the room will stay unchanged.
Plan Finishing, Maintenance, and Material Use
White birch veneer can look pale and even under workshop lights, yet its grain and color may shift after finishing. Test the intended stain or clear coat on an offcut from the same batch. A water-based finish may raise the grain slightly, so lightly sand and inspect before coating the visible face. Keep the veneer flat while acclimating it to the room where it will be installed. Small differences in humidity matter.
The USDA Forest Products Laboratory’s Wood Handbook (FPL-GTR-282, 2021) reports equilibrium moisture contents of about 6.2% at 30% relative humidity and 9.2% at 50%, at 70°F.
That two-point change is a useful reminder: allow the substrate and veneer to settle in the project’s normal indoor conditions before bonding. I have seen rushed panels telegraph stress at their edges. Not always, but enough to plan for it. After installation, use a soft, barely damp cloth and dry spills promptly. Avoid standing water, abrasive pads, and prolonged direct sun, which can dull the surface or change its appearance. Record the finish used; future repairs are easier when the product and application steps are known.



 08045479132

 Send Inquiry


 Send Inquiry
 Send SMS