| Spacer size and grout joint | Select the spacer width to match the specified grout joint and the tile manufacturer's requirements. Common residential joints include approximately 2 mm, 3 mm, and 6 mm. | Choosing a spacer only because it is included in a kit, without checking the design specification. | Inconsistent joint width, poor visual alignment, or insufficient room for grout. | Measure several joints with a joint gauge or ruler before the mortar sets. |
| Tile format | Use leveling spacers when large-format, rectangular, or lightly warped tiles require help maintaining a flush surface. | Assuming a leveling system can correct severely bowed tiles or an uneven substrate. | Lippage remains visible and the clips may be overloaded or difficult to remove. | Dry-lay several tiles and check flatness before installation. |
| Substrate flatness | Correct significant high and low areas before tiling. A leveling system is intended to align adjacent tiles, not replace substrate preparation. | Applying extra adhesive only under isolated tiles to compensate for an uneven floor or wall. | Uneven bonding, hollow spots, cracked grout, or tile movement. | Use a straightedge to identify deviations before spreading mortar. |
| Mortar coverage | Comb mortar in one direction, back-butter larger tiles when required, and periodically lift a tile to verify coverage. Wet areas and floors generally require high coverage according to the applicable installation standard. | Using small isolated adhesive spots or failing to collapse ridges beneath the tile. | Weak support, voids, cracked tiles, and water-sensitive installation problems. | Remove a freshly placed tile and inspect the mortar transfer on both surfaces. |
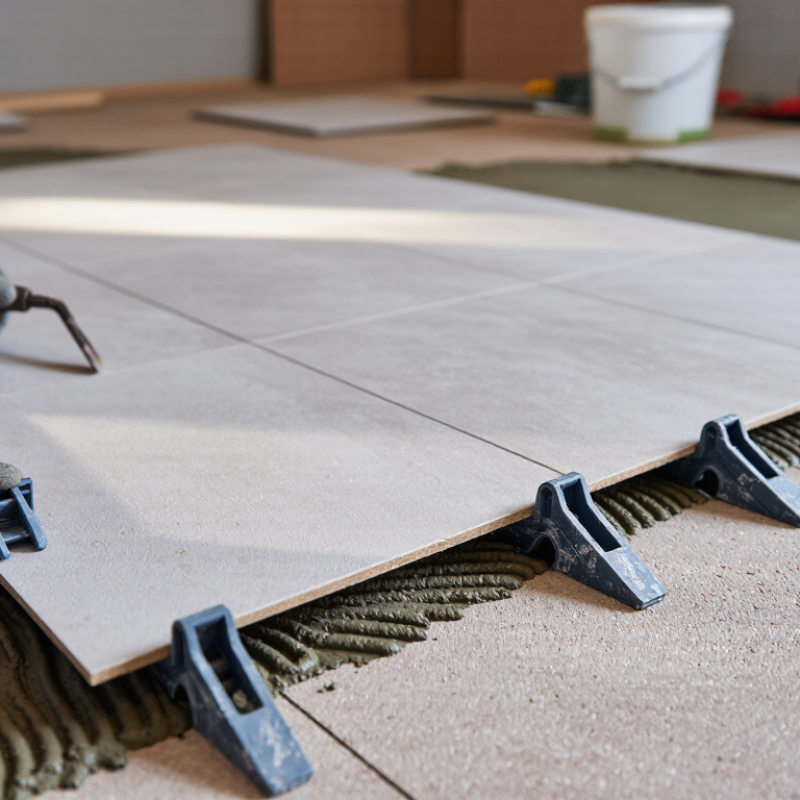
| Clip placement | Place clips at the tile edges or corners as directed by the system instructions, keeping them fully seated beneath the tile surface. | Positioning clips too far from the corner, placing them over an unsupported void, or trapping mortar around the clip. | Uneven pulling force, damaged clip bases, or difficult removal. | Confirm that each clip is stable and aligned before tightening. |
| Wedge or cap tightening | Tighten by hand until adjacent tile faces are flush. Use consistent, moderate pressure rather than maximum force. | Over-tightening the wedge or cap to force tiles into position. | Tile displacement, chipped edges, squeezed-out mortar, or broken clips. | Stop when the surfaces are aligned and the spacer remains centered in the joint. |
| Tile alignment | Check level, plane, joint direction, and pattern regularly instead of relying only on the leveling hardware. | Installing long runs without checking the layout or reference lines. | Cumulative layout errors, drifting grout lines, and an uneven finished pattern. | Use a straightedge, spirit level, and chalk or laser reference lines throughout the installation. |
| Open time and working area | Spread only the amount of mortar that can be covered within its open time, which varies with product, temperature, humidity, and substrate absorption. | Spreading too much mortar and attempting to level tiles after the mortar has skinned over. | Poor adhesion, reduced mortar transfer, and unstable tile positioning. | Perform a periodic finger-touch check and remove skinned mortar before continuing. |
| Spacer removal | Remove reusable wedges or caps before grouting. Break disposable clips by striking them in the direction recommended by the system instructions, usually along the joint. | Pulling clips upward or leaving clip fragments above the grout line. | Chipped tile edges, visible plastic, and grout discoloration or failure. | Inspect every joint and remove debris before applying grout. |
| Curing time | Keep tiles undisturbed until the mortar has reached the required initial cure stated on its technical data sheet. | Walking on the surface, moving tiles, or removing clips too early. | Tile movement, lippage, bond loss, and disturbed joints. | Follow the mortar data sheet rather than using a universal curing time. |
| Movement joints | Preserve required perimeter and field movement joints; do not fill them with rigid grout when a flexible sealant is specified. | Treating every gap as a standard grout joint. | Cracked grout, tented tiles, or debonding caused by movement. | Compare joint locations with the project specification and substrate conditions. |
| Cleaning during installation | Remove mortar from tile faces and joints while it is workable, using tools that will not scratch the tile surface. | Allowing mortar to harden around clips, in grout joints, or on textured tile faces. | Difficult cleanup, reduced grout depth, and permanent residue. | Complete a final joint and surface inspection before the mortar cures. |



 08045479132

 Send Inquiry


 Send Inquiry
 Send SMS